How to create Overviewer maps from Minecraft Realms
Note: This article is out of date now. I’m working on an updated version though! Subscribe to my free Substack to get an email when it’s finished:
Realms is the easiest (if not the cheapest) way to run a Minecraft server. Mojang do all the admin work for you: security, player access, backups, Herobrine protection.
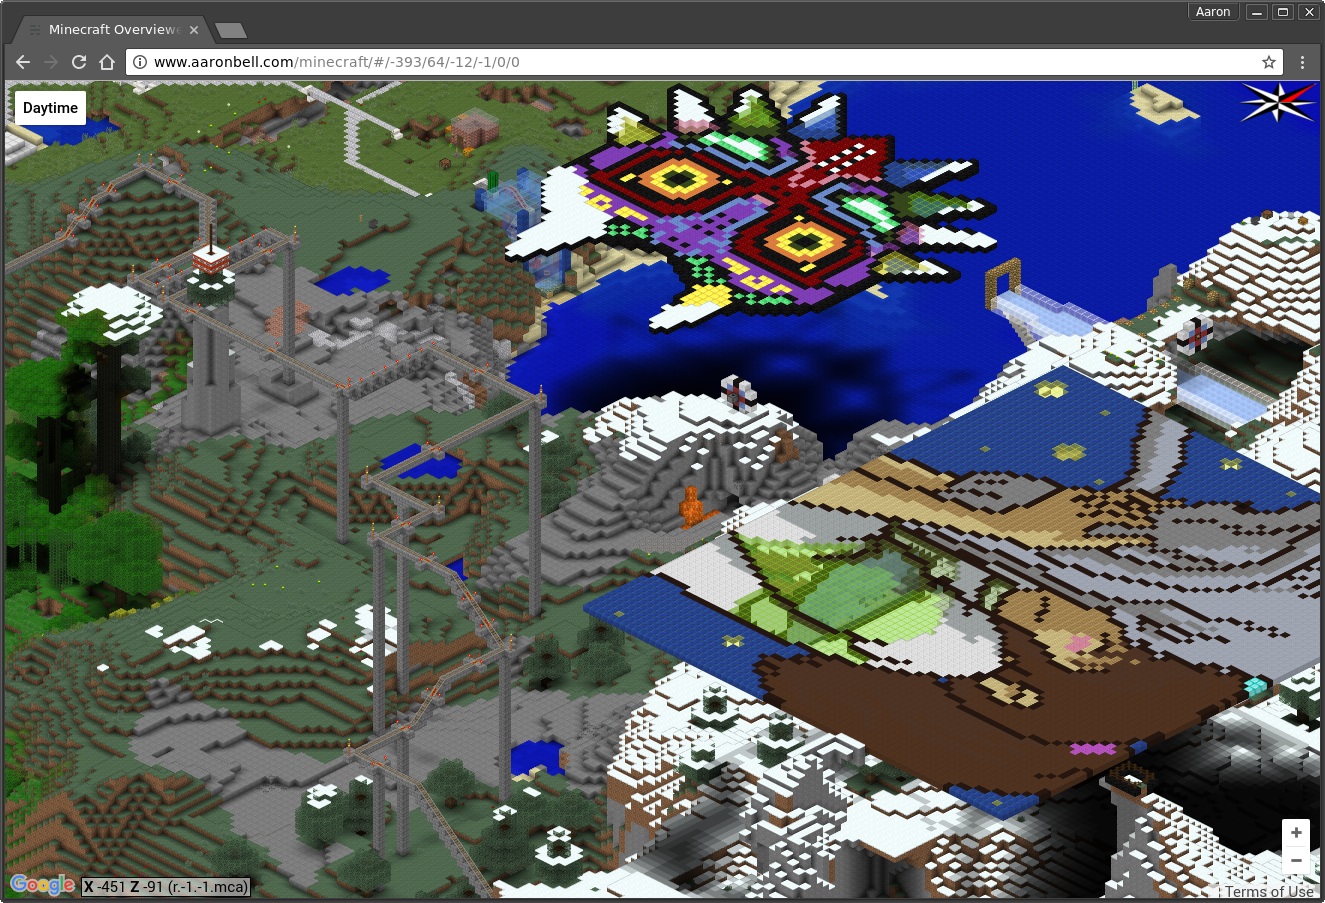
Overviewer is a ridiculously cool project that generates a Google Map of your world, like this:
At the moment there’s no easy way to bring these things together.
This article explains how to download your world using the Realms API, and create an interactive map.
To the command line we go!
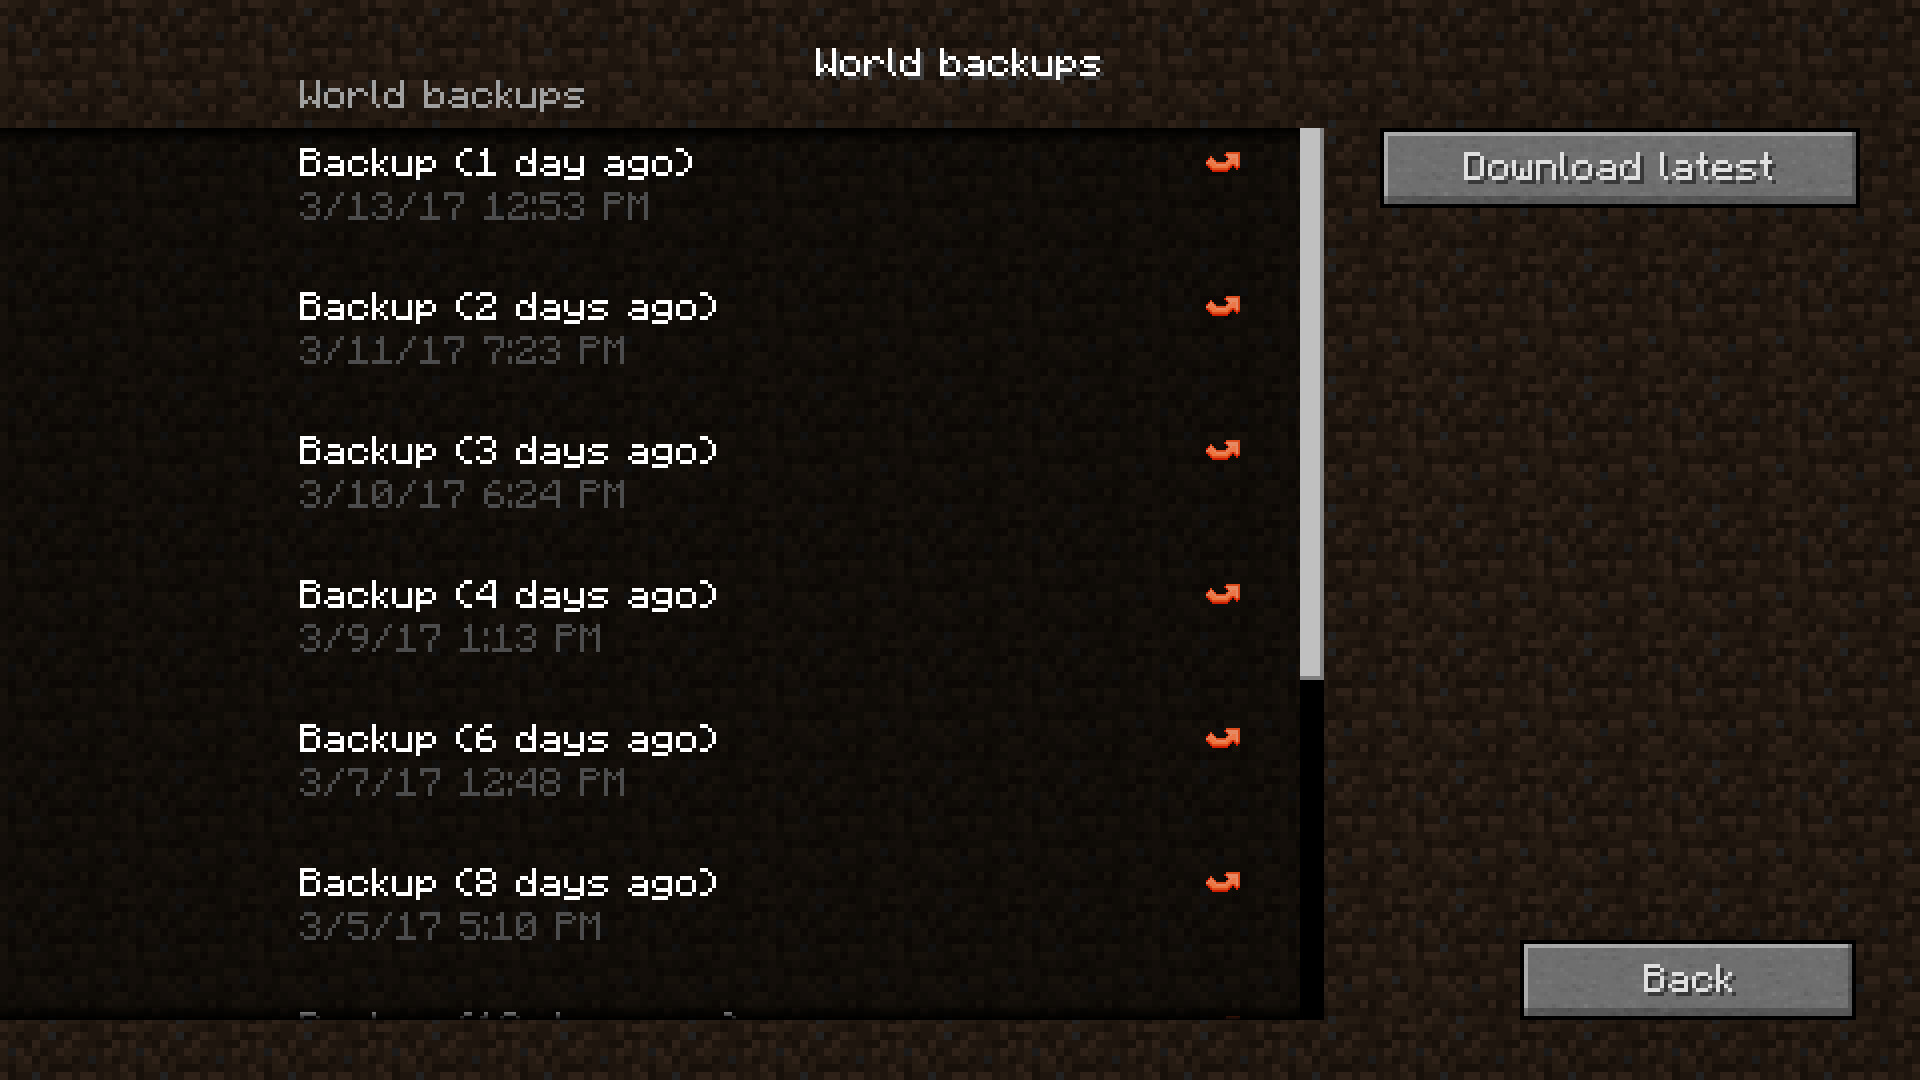
As you may know, downloading your world by itself isn’t too difficult - you can click around on this screen like some kind of animal:
We will not stoop to this level since we are Serious Admins With Things To Do. We’ll use the Linux command line to automate everything.
I’ve done the hard work of getting the (undocumented!) Realms API working, and made simple tools to make it easy.
What you need
To get world data and make the map, you need:
- A Linux command line, to run scripts written in bash. You could:
- Use a Linux laptop, or a Chromebook running Linux.
- Use a Linux server. A server is great for automating the process, but you’ll need to host the map on a webserver to look at it.
- My new favourite option is to run Linux in Windows 10. It’s a free feature and it works perfectly. Follow this article from Microsoft to get an Ubuntu command line running. My Windows PC is a gaming rig with a powerful CPU, which is great for map rendering.
- A computer with fast CPUs! Overviewer maps take a while to create, and the number crunching needs every scrap of horsepower on your computer. The more CPU cores you have the better.
- Some basic command line experience. I assume you know how to cd and unzip.
Once you have your map, you can zip it and send it to fellow players using cloud storage like Google Drive. Or if you have a webserver, you can host the map like I do at aaronbell.com/minecraft - see below for instructions.
1. Setup: Get the scripts
We need to download the scripts from the github repository.
If you have git, pull them from github:
$ git clone https://github.com/air/minecraft-tools.git
$ cd minecraft-tools
If you don’t have git, download the zip and extract it.
2. Setup: Install tools
We need a tool that sends HTTP requests (httpie), and another that parses JSON documents (jq). Let’s install them:
$ sudo apt-get update
$ sudo apt-get install -y httpie jq
Next, we need Overviewer itself:
$ sudo apt-get install -y software-properties-common
$ sudo apt-add-repository 'deb http://overviewer.org/debian ./'
$ http --body http://overviewer.org/debian/overviewer.gpg.asc | sudo apt-key add -
$ sudo apt-get update
$ sudo apt-get install -y minecraft-overviewer
Finally, if this computer doesn’t have Minecraft installed, you’ll need to download the free client jar containing the textures Overviewer needs:
$ sudo apt-get install -y curl
$ overviewer/get-minecraft-client-jar.sh
3. Get your world data
Now we can log into Minecraft using their authentication API:
$ source login.sh EMAIL PASSWORD
Note: We’re using the source command to set variables in our environment. These values are picked up by the other tools. You can read about this approach on stackoverflow.
Next, download our world:
$ ./realms-download.sh
This downloads the current world data to the current directory as world.tar.gz.
Note: If the Realms API is busy at that moment, you may see a Retry again later message. If this happens, just keep trying until it works.
Last, let’s extract our world data:
$ mv world.tar.gz /tmp
$ cd /tmp
$ gunzip world.tar.gz
$ tar xvf world.tar
Now the data’s ready to process at /tmp/world.
4. Make the map
We just need to start Overviewer, using the config file render.py I provided in minecraft-tools/overviewer:
$ cd -
$ overviewer.py --config=overviewer/render-config.py
This will pick up the data in /tmp/world, and create a new map in /tmp/world-map.
5. We’re done
Open up /tmp/world-map/index.html in your browser. Amazing!
Making it automatic
Whenever you need to update your map, just repeat steps 3 and 4.
Optional: Host the map on a webserver
To host the map on a webserver, you need an API key from Google. If the key isn’t added correctly to the index.html file, the map won’t display. Follow the steps on their site to get one.
Then to update your index.html with the new key, use:
$ overviewer/insert-google-key.sh /tmp/world-map YOUR_API_KEY
Whenever you generate a new map, remember to add the key.
Conclusion
I hope you find this stuff as useful as I do. I would love to see the maps you’ve created - leave a comment with a link!
If you’d like to contribute to the code, please raise issues or pull requests on Github - or just leave a comment. Thanks!
Appendix of interesting things
Things I didn’t realise about Realms
- You only get one active world at a time. This is a little disappointing if you want to run Creative and Survival servers side by side. Sad face.
- There is a Realms API, but it’s not documented.
- There’s an unofficial doc at http://wiki.vg/Realms_API
- There are powerful tools already on github like node-yggdrasil - but they have huge surface area and require >70 javascript modules. We just need some REST calls, so forget that.
IP blacklisting
It appears that attempts to log in from certain computers are just not allowed by the Minecraft authentication server. For example, I can login from my PC, but not from my DigitalOcean server.
If you can help me understand what’s going on here I’d love to know.